Intercom
Intercom is a customer messaging platform that allows businesses to engage with their website visitors and users through various messaging channels, providing a real-time and personalized communication experience.
Getting Started
To successfully configure Intercom as a destination in Ucraft Next, in your Intercom account, you need to get an App ID and an Access Token.
Get the App ID
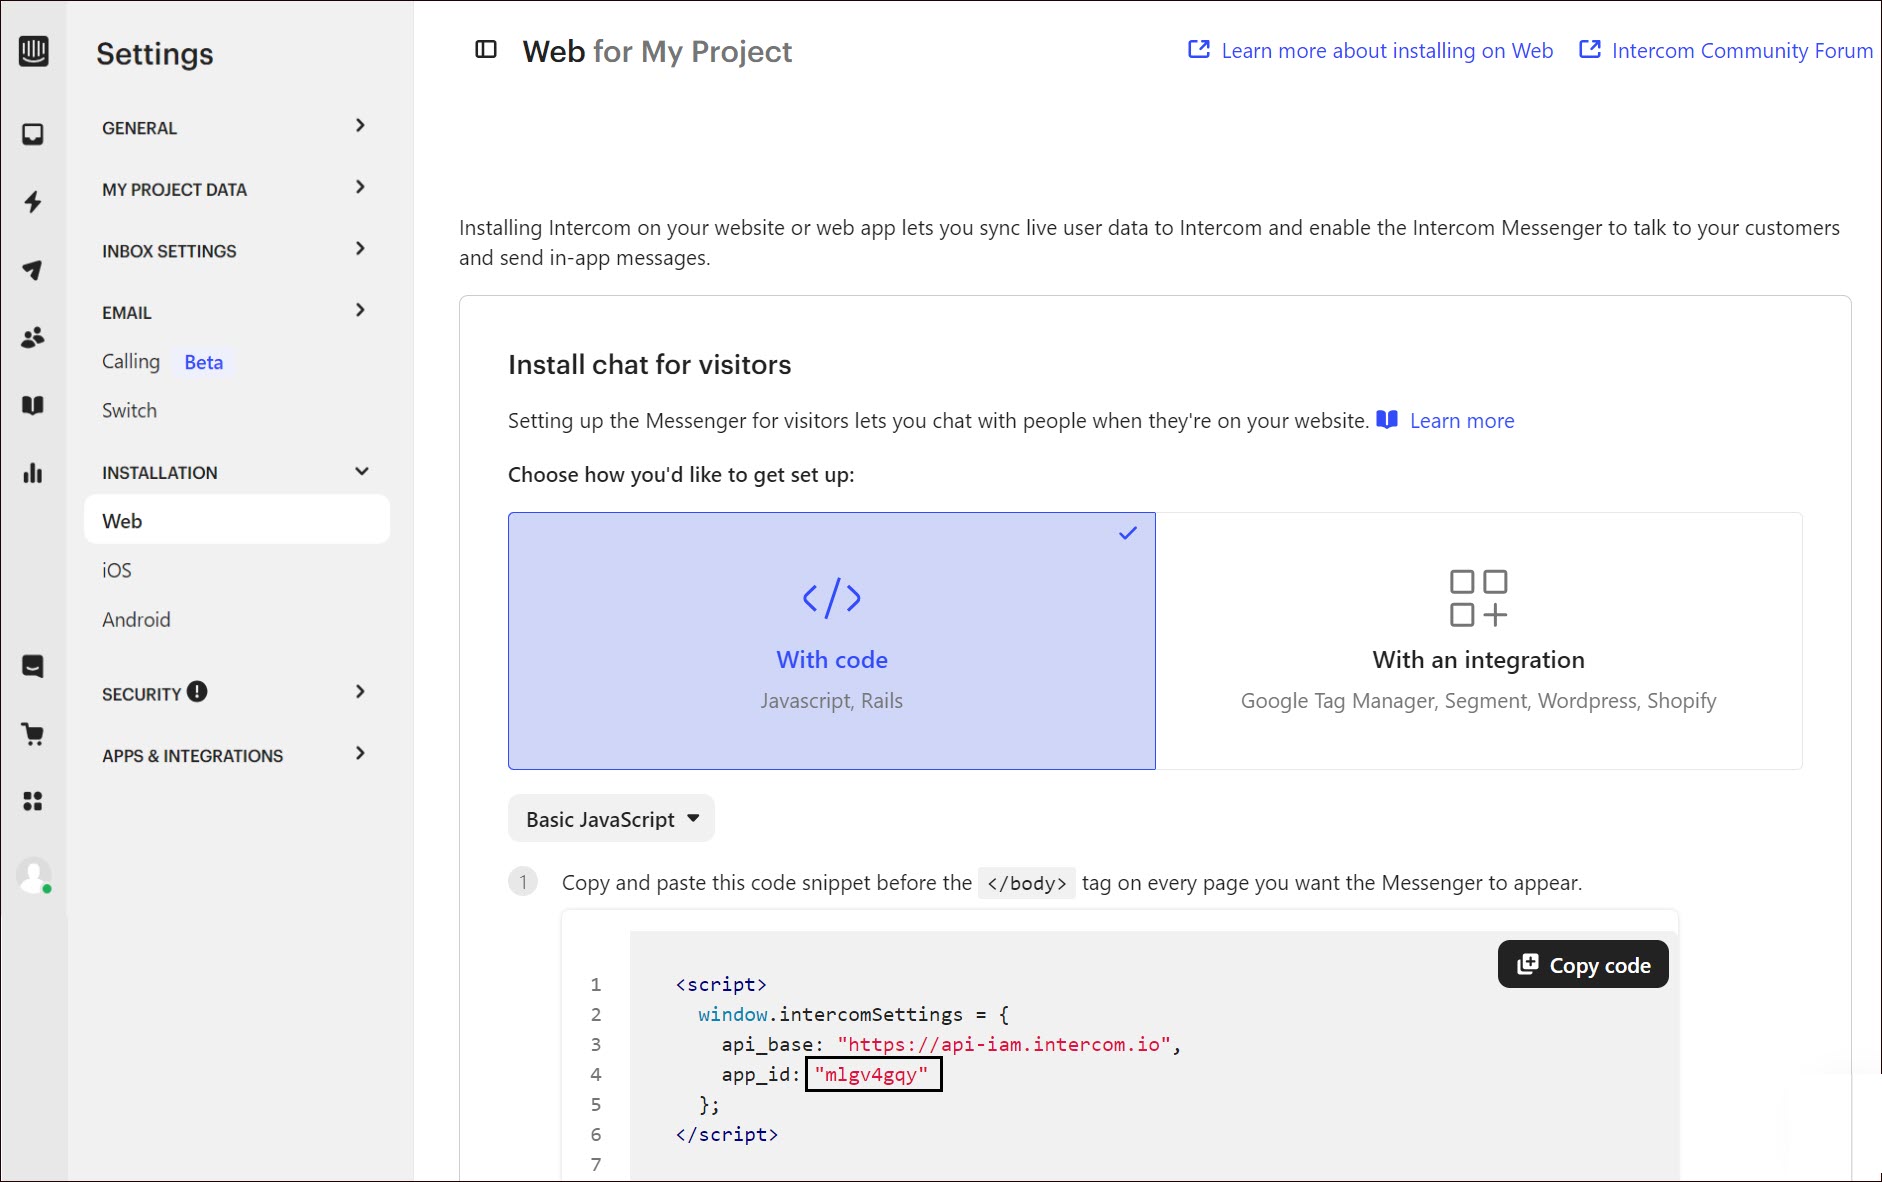
- Log in to your Intercom account.
- Go to Settings > Installation > Web.
- Click With code. The App ID is displayed in the
app_idcode snippet.
Get an Access Token
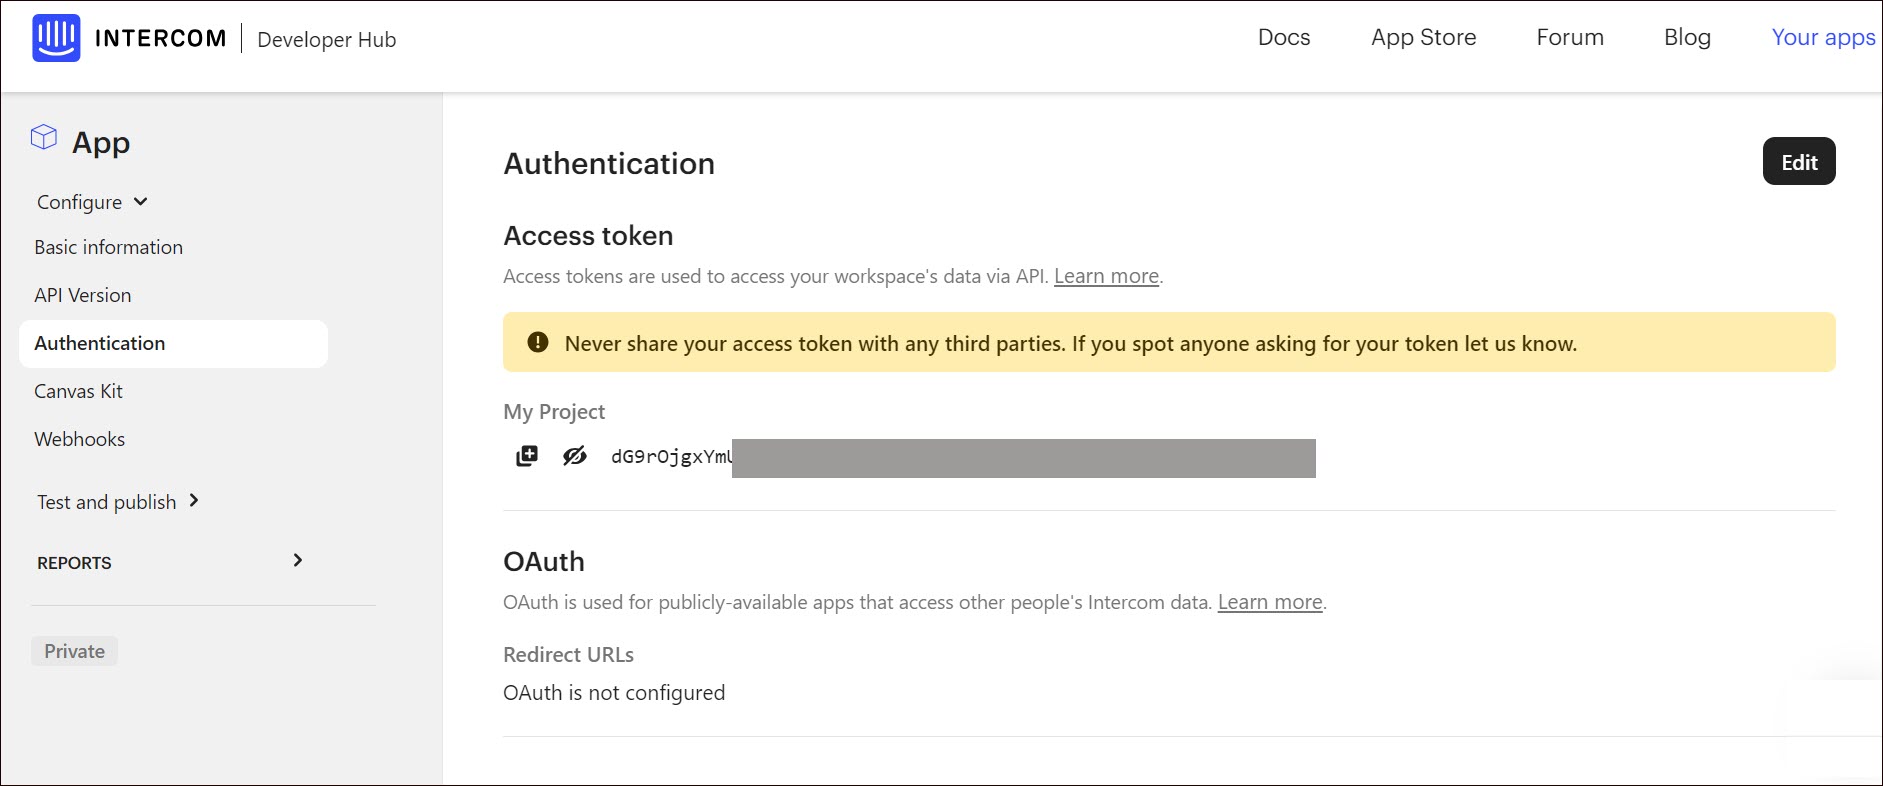
- Go to Settings > Apps & Integrations > Developer Hub.
- Click New App.
- Enter the app name and click Create App.
- Click the name of the app and go to Authentication.
- Click Reveal to reveal your access token and click Copy to clipboard.
To see the user cloud mode actions, go to Contacts > All users. Click the corresponding user, the user actions are displayed in the Recent events section on the right side.
Set up Intercom
- Go to Apps on your Ucraft Next Dashboard.
- Click Get App.
- Select Intercom in the App Store.
Tip: To easily switch projects, click the project switcher at the top left of the page.
- Click Get App and then click Install.

Complete the purchase flow and click Go to my project.
Enter App ID and Access Token.
Click Save Changes.
