Webhooks
A webhook integration establishes an effective communication channel between Ucraft and other web applications, enabling real-time data exchange and triggering actions based on events. Webhook integration enhances interoperability between web applications by allowing event-driven communication, facilitating data synchronization, and automating business processes in real time.
Getting Started
To configure Webhooks in Ucraft Next, you need valid webhook data according to the REST API standards, including a webhook URL and headers (key, value).
Set up Webhooks
Go to Apps on your Ucraft Next Dashboard.
Click Get App.
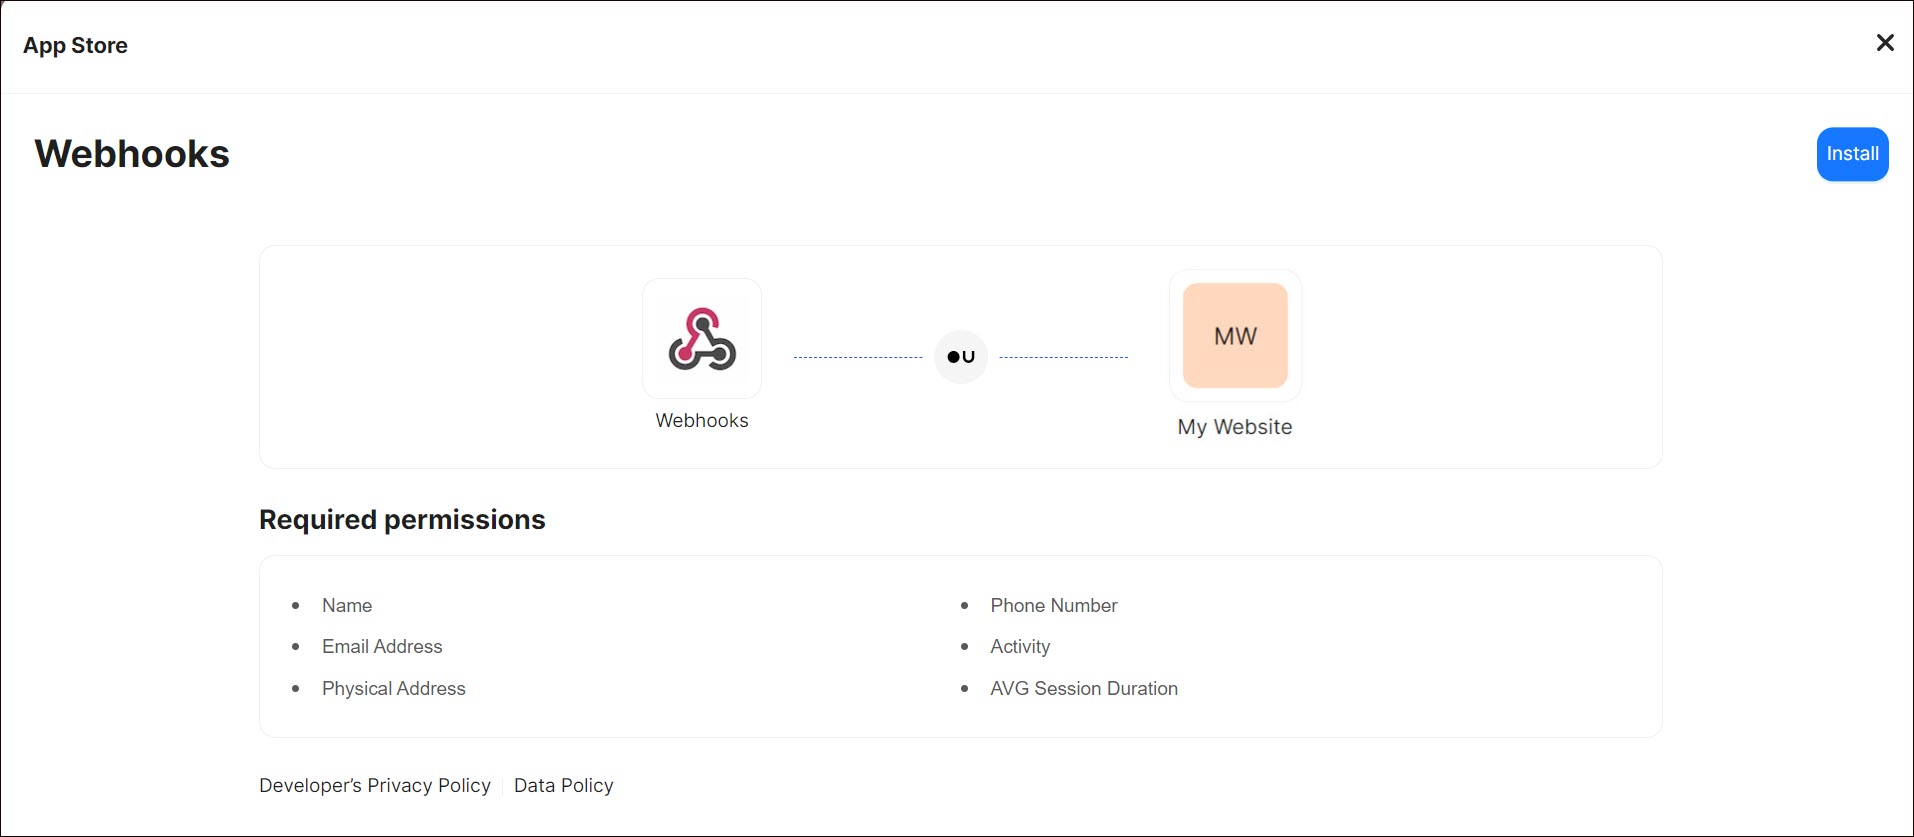
Select Webhooks in the App Store.
Tip: To easily switch projects, click the project switcher at the top left of the page.
Click Get App and then click Install.
Complete the purchase flow.

Create a Webhook
- On your Dashboard select Webhooks from the list of applications.
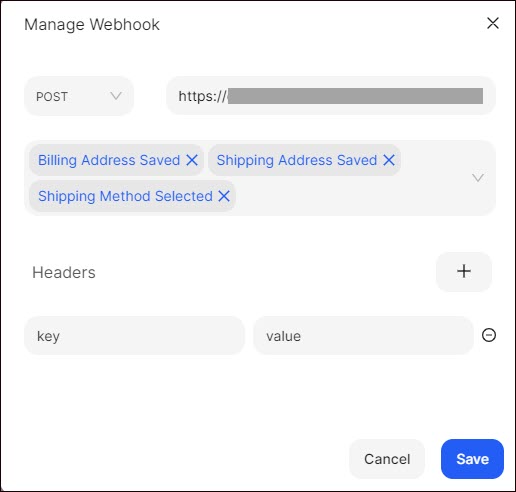
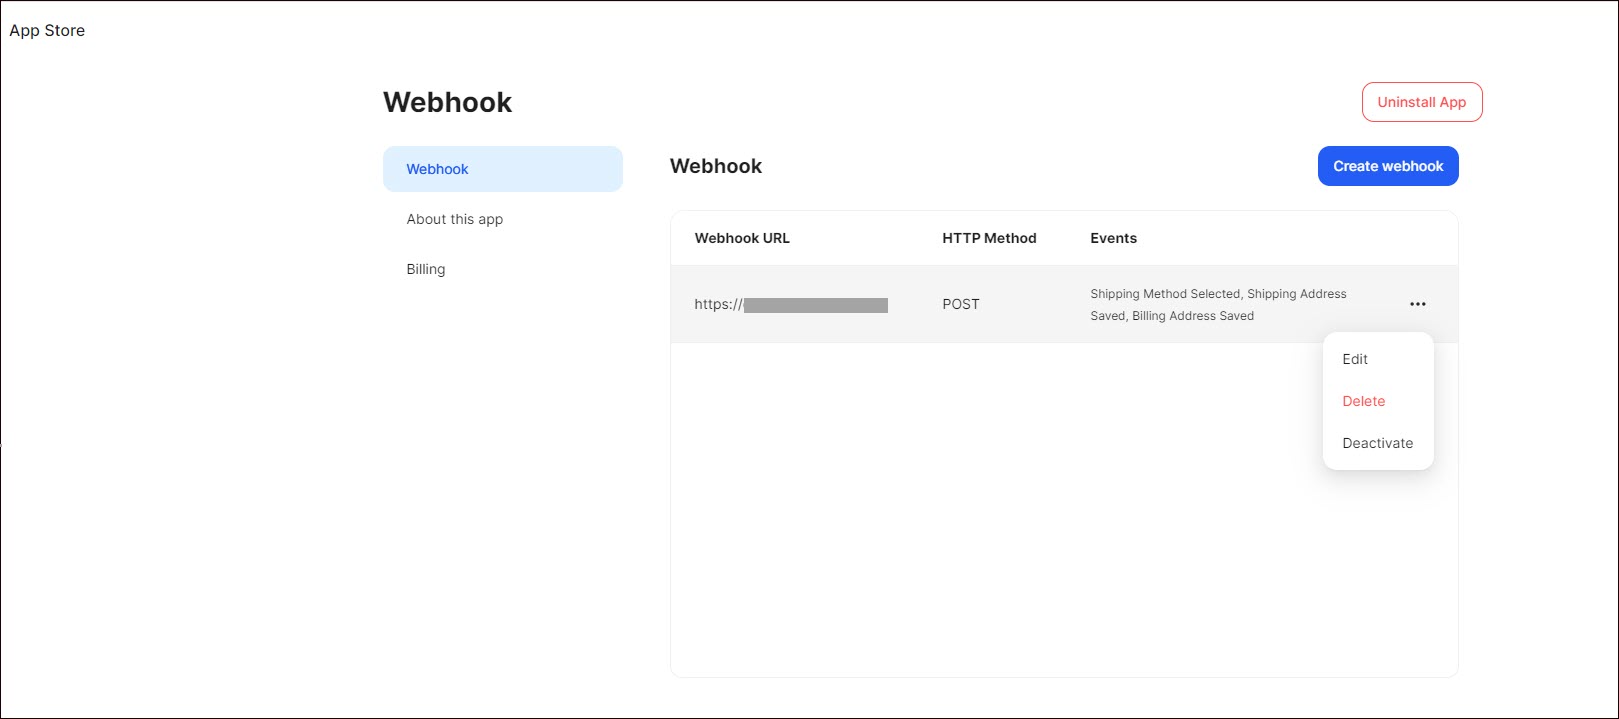
- Go to Webhooks and click Create webhook.
- Select the HTTP method to receive the webhook payload from the following available options:
- GET
- PUT
- POST
- PATCH
- DELETE
- Insert the valid webhook URL, where the HTTP methods will be sent.
- Select the event type from the list you want to receive.
- Click the plus icon to add headers.
- Indicate keys and values according to REST API standards, if necessary.
- Click Save.
Note: The webhook body is the UC event payload.

Tip: To edit, delete, and deactivate/activate the created webhook, hover over the corresponding webhook, click the Dotted Menu, and select the corresponding option.
